

Continuous Integration with Git Submodules
tl;dr Git submodules are great for sharing code between repos, but somewhat tricky when testing/building them in the cloud. I'll show you how to make it work.
Two things are really awesome: 1) Automatically having your code tested upon committing it to a repository and 2) reusing shared code across different repositories. In this post I will outline how to do both. Specifically, I will show you how to set up a working continuous integration build, using the new and fabulous Bitbucket Pipelines with a Git repository that has a submodule dependency.
Having a Git submodule in your repo makes the CI setup slightly non-trivial, so this post was partially written as a “note to future self” (as I won’t remember how to do this 6 months from now ;-). Let’s get right to it.
Git Submodules
Suppose we have two individual projects, Foo and Bar, each in their own Git repository. Both use a model class called Doobidoo (in this example a Javascript file, but it could be any kind of source file). The repo structure of both Foo and Bar might look like this:
src/
├ controller/
└ model/
  ├ ...
  └  Doobidoo.js
test/
└ model/
  ├ ...
  └  Doobidoo.spec.js
As both projects evolve, the model class Doobidoo is enhanced and updated on a regular basis. Because the codebase is awesome, we of course write and update unit tests, which are stored in test/Doobidoo.spec.js. This file, too, is updated regularly. Both projects expect to work with the same model class, so whenever the source code of Doobidoo.js or its associated tests is changed within one repo, it must be updated in the other repo. How do we achieve such a sync?
 A repository within a repository within a …
After dismissing crazy ideas like symlinks or manually copying the contents back and forth, a quick Google search
should convince you that this scenario is
a perfect fit for Git submodules.
You can think of a submodule as a simple Git repo within your repo. The git submodule family of commands makes sure
that your outer repository treats the inner, shared repository with respect. That’s all I’ll explain about submodules
at this point - if you want to learn more, go ahead and read
the official tutorial.
So what do we do with the shared code, then? We create a new Git repo Shared with the following structure:
src/
└ model/
  └  Doobidoo.js
test/
└ model/
  └  Doobidoo.spec.js
Let’s assume this new repo lives at URL <shared-repo-url>. To add the submodule to Foo and Bar, we can now
delete the Doobidoo*.js source files from both those repos and then run git submodule add <shared-repo-url>
shared/ within the root folder of each project. The structure of Foo and Bar will now be
shared/
├ src/
| └ model/
|   └  Doobidoo.js
└ test/
  └ model/
    └  Doobidoo.spec.js
src/
├ controller/
└ model/
  └ ...
test/
  └ ...
Note: The git submodule add command adds a .gitmodules file to the outer repo, which you need to add and push.
Also, the first time around you may need to run git submodule init followed by git submodule update in the outer
repo to make sure the latest version of your Shared repo ends up in the shared folder. After that you should adapt
all references to Doobidoo.js within the Foo and Bar projects. For example, a reference that formerly pointed to
./model/Doobidoo.js would now read ../shared/src/model/Doobidoo.js. When you’re done, make sure all your unit
tests are up to date
and passing.
Part 1 is done - we have moved the shared code to a Git submodule! Simply treat the code inside the shared/
folder like you would treat any other repo. If you change anything within the folder (regardless of whether you
change it within the Foo or the Bar project or elsewhere), you can query the changes with git status then
git add, git commit and git push them. Afterwards git pull the changes from all other repos that use the
submodule. Be sure to run all these commands within the shared/ folder.
Continuous Integration with Bitbucket Pipelines
If you have ever browsed the codebase of an open source project on Github, you will be familiar with the status badge that usually (and hopefully) looks like this:

How does GitHub know whether the latest code that was pushed to the repository is actually passing the tests in the codebase? The short answer: It doesn’t. The badges are powered by third party continuous integration services, such as Travis CI and others. In a nutshell, these services listen to changes in your repo and fire up a virtual machine in the cloud that runs your unit tests every time you push something. Pretty neat, huh?
When you’re working on open source projects everything is fine and dandy - both GitHub and Travis are free for such. However, should you not be ready to share your code with the world… well, you’re out of luck. This is where both GitHub and Travis expect some dough and - to be honest - I think this is a very fair business model. Nevertheless, for a personal project, the fees may strike you as somewhat hefty. If you’re comfortable with it, go ahead and spend that $7/month on a personal GitHub account and $129/month (!) on Travis.
 Look at them pipes…
Or don’t. Because recently, something awesome happened. As you might know, Atlassian, the enterprise software giant
and maker of JIRA and Confluence, has been offering free unlimited private Git repos for small teams (up to 5 people)
as part of its cloud-hosted Bitbucket platform for quite some time now. Up to now, that’s what
it was to me - a code silo for personal projects. However, recently Atlassian added something very cool on top:
Bitbucket Pipelines. Rather then plugging in third party
providers (like the GitHub + Travis model), Pipelines is an integral part of Bitbucket, meaning you get a fully
integrated CI solution with your hosted repo. Pipelines is currently in beta (there is a 1-2 day wait after you sign
up), but already it feels pretty awesome. I played around with it and liked it for several reasons:
- Having CI as an integrated part of a cloud-hosted repo feels very natural.
- The UI is nice and clean.
- It’s currently free (with a limited quota of build minutes).
UPDATE 2016-10-25: Pipelines has left beta status now and does offer a free tier with 50 build minutes / month, which seems like a very fair deal.
Enough chatter - let’s look at how we would test the repos described above with Bitbucket Pipelines. Assuming the
remote of each repo lives on Bitbucket (i.e. at https://bitbucket.org/<user-or-org>/<repo>.git) and that you have
successfully signed up for Pipelines, we first enable Pipelines in the repo’s settings:

Then, create a file called bitbucket-pipelines.yml in the root folder of your repo. This is where you specify what
kind of image / environment the build should run in and what is to be tested. Let’s assume that Foo and
Bar from above are simple Node.js projects and that all unit tests are run by invoking npm test. Then, a valid
bitbucket-pipelines.yml would look like this:
image: node

pipelines:
  default:
    - step:
        script:
          - npm --version
          - npm install
          - npm test
Simple enough, really. Once you push this file to the repo (and on every subsequent push or pull request), Pipelines will spring to life, run your tests and decorate your branches with a test status. You can follow the log output if you like (I found this to be very entertaining at least for the first couple of builds ;-).

Part 2 is done - now you know what Pipelines is and how to enable and trigger cloud-based builds with it.
Putting it Together
I have to make a confession. When I told you that the above bitbucket-pipelines.yml would trigger a successful
build of the Foo and Bar repos, that was only partially true. For the initial version (without the submodule)
everything would indeed work fine. However, for the refactored version, the test script will fail:

The (Node.js) error would read something like
Error: Cannot find module '../shared/src/model/Doobidoo'
What’s going on here? We did update all the references to Doobidoo.js and made sure our unit tests were passing
locally, so this cannot be an issue with relative paths. Indeed it is not - the problem is simpler: On the virtual
machine Pipelines first clones a fresh copy of our repository before running the tests. Without explicitly telling
Pipelines to pull submodules, too, this copy will not contain the shared/ folder with our submodule code. Darn!
So surely we can just tell Pipelines to first pull all the submodules, too, right? You bet!
image: node

pipelines:
  default:
    - step:
        script:
          - git submodule update --init --recursive
          - npm --version
          - npm install
          - npm test
The git submodule update --init --recursive tells Pipelines to first and foremost clone all submodules contained
within the repo, which is what we want. Let’s push again and trigger a new build:

Oh, dear, what’s wrong now? You probably already guessed it - the Shared repo that you added as a submodule needs
to be pulled from the <shared-repo-url> using some sort of authentication. When you added it locally on your
machine, chances are that that you used a working SSH configuration for the URL, e.g.
git@<personal-bitbucket>:<user-or-org>/<shared-repo-name>.git. In that case the error will read:
ssh: Could not resolve hostname <personal-bitbucket>: Name or service not known
The way things are at the moment, the virtual machine that Pipelines fires up cannot possibly know about your SSH
authentication for the shared repository (nor should it!). So what do we do? Tell Pipelines about
<personal-bitbucket> and add your private SSH key to the build script? That would be a very bad idea for several
reasons:
- You should never, ever use a personal auth key for an automated process.
- Keys used by an automated process should always have read-only access to repos.
- You shouldn’t put verbatim keys in repository source code.
Let’s think about how authentication works on your machine. In your ~/.ssh/config file you probably have an entry
similar to this:
# My Bitbucket configuration
Host personal-bitbucket
   HostName bitbucket.org
   User git
   IdentityFile ~/.ssh/id_rsa_my_private_key
Basically, we would like our Pipelines script to have a similar configuration of its own (with read-only access to the repo). Fortunately, like most cloud-hosted repository providers, Bitbucket allows us to configure such access by using so-called Deployment Keys. So here is how we fix our build, step by step.
1. Generate a Deployment Key
In your console navigate to ~/.ssh/ and run
ssh-keygen -q -t rsa -N "" -C "<email_address>" -f <filename>The email address is rather unimportant, but for sake of completeness you may want to put a sensible real-life contact
for your automated script here. The filename should have no extension and could be something like
id_rsa_myproject_ci. You should now have a public key (id_rsa_myproject_ci.pub) and a private key
(id_rsa_myproject_ci) for the continuous integration account in your ~/.ssh/ folder.
Now is a good time to add this key to your ~/.ssh/config file (we will need it later). Go ahead and create the
following entry:
# Bitbucket configuration for continuous integration account
Host myproject-ci-bitbucket
   HostName bitbucket.org
   User git
   IdentityFile ~/.ssh/id_rsa_myproject_ci
2. Add the Deployment Key to Bitbucket
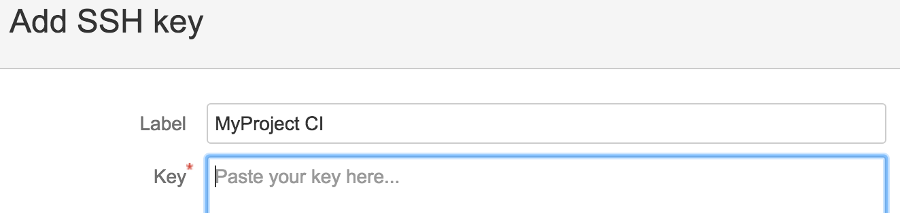
Go to the Settings > Deployment Keys section of your Shared repository on Bitbucket. Click on Add Key, give
it a Label and paste the content of the public keyfile (id_rsa_myproject_ci.pub) in the Key field.
After saving the key, our CI account will now have read-only access to the Shared repo. Sweet!
3. Add the Private Key as an Environment Variable
The build script will need to pull the repo using the SSH identity we just created, so at one point, it must have access to the private key file. Since we don’t want to put the private key in the source code, the cleanest way is to use an environment variable. Again, Bitbucket has us covered. In fact, we have two choices - Repository Variables and Account Variables. If you plan on using the CI account only for one shared repo, you can choose the former, otherwise (and this is what we’ll do) you can add the key as a (global) account environment variable.
Navigate to Bitbucket Settings (top right, by your avatar pic), then to Environment Variables. Add a new variable
MYPROJECT_CI_PRIVATE_KEY. For the value paste the content of the private key file (id_rsa_myproject_ci), however,
replace all line breaks with the \n literal before pasting. Be sure to check the Secured box, which will ensure that
the key is never actually visible in the settings.

4. Update the Build Script
Now that we have our deployment key in place and the private key at the ready, it’s time to put everything together. In a nutshell, once the virtual machine has booted up, we want to
- Write the private deployment key to an identity file.
- Add an SSH configuration with the new identity file.
- Pull the submodules.
And here is how we do it:
image: node

pipelines:
  default:
    - step:
        script:
          - mkdir ~/.ssh
          - echo -e $MYPROJECT_CI_PRIVATE_KEY > ~/.ssh/id_rsa_myproject_ci
          - chmod 600 ~/.ssh/id_rsa_myproject_ci
          - echo -e "Host myproject-ci-bitbucket\n   HostName bitbucket.org\n   User git\n   IdentityFile ~/.ssh/id_rsa_myproject_ci\n   StrictHostKeyChecking no" > ~/.ssh/config
          - chmod 600 ~/.ssh/config
          - git submodule update --init --recursive
          - npm --version
          - npm install
          - npm test
Are we done? Almost. There is one tiny thing missing: The submodule we added to the Foo and Bar repos back in the
day still uses the old <shared-repo-url>. Let’s go ahead and update that. Instead of using some git submodule
command, you may edit the URL directly in the .gitmodules file, which should then look like this:
[submodule "shared"]
	path = shared
	url = git@myproject-ci-bitbucket:<user-or-org>/<shared-repo-name>.git
Run git submodule sync once and make sure your tests still work locally, then push the updated
bitbucket-pipelines.yml and .gitmodules file (for the Foo and/or Bar project). Tuuuhduuuuuh - we should again
see a passing build:

Part 3 is done - we have successfully set up a Bitbucket pipelines build of a repo with a submodule dependency!
Final Thoughts
Of course, you can achieve a similar setup on other platforms, including GitHub + Travis. Instead of a
bitbucket-pipelines.yml you would use a .travis.yml and instead of a deployment key you may want to think about
using Access Tokens, which are
even easier to use than an SSH key pair.
The main takeaway from this blog post is that it makes sense to use Git submodules for shared code and that - with a little extra effort - you can use a CI service such as Pipelines or Travis to test a repo with submodule dependencies, just like you would test a normal repo. All you have to do is to make sure that the build script is able to pull the submodules before running the build. Hopefully, this post gave you some ideas what to look out for.